Skip to content

keeping those condenser coils clean on your commercial fridge isn’t rocket science – it’s more like keeping your BBQ grill clean. Just like your grill gets crusty from all that grease and grime, these coils get covered in kitchen crud. All that gunk makes your fridge work way too hard, kind of like trying to breathe through a stuffed-up nose.
The good news? You don’t need to shell out cash for some repair guy. This is totally DIY territory, like changing your car’s oil. Grab some basic tools, roll up your sleeves, and you’re good to go. Heck, I’ve seen kitchen newbies tackle this job without breaking a sweat.
Dirty coils are basically money down the drain. Your fridge ends up chugging more power than a teenager with an energy drink, trying to stay cold through all that insulation of dust and grease. Plus, making it work that hard is a surefire way to burn it out early. Nobody wants to be shopping for a new commercial fridge because they skipped out on basic cleaning.
Want the step-by-step on how to get those coils spotless? Trust me, it’s easier than making toast. I’ll walk you through it.
The Best Way to Clean Commercial Refrigerator Coils
Cleaning those fridge coils really isn’t as tough as it sounds. Think of it like vacuuming under your couch – once you know what you’re doing, it takes about as much time as brewing a cup of coffee.
I’d love to show you exactly how it’s done step by step right now, but since we can’t watch videos together, how about I walk you through the process? That way you’ll know exactly what to do when you’re ready to tackle those coils. Sound good?
Besides, having someone explain it usually helps catch those little tricks and tips that make the job easier – stuff that might fly by too quick in a video. What part of the cleaning process would you like to know more about?
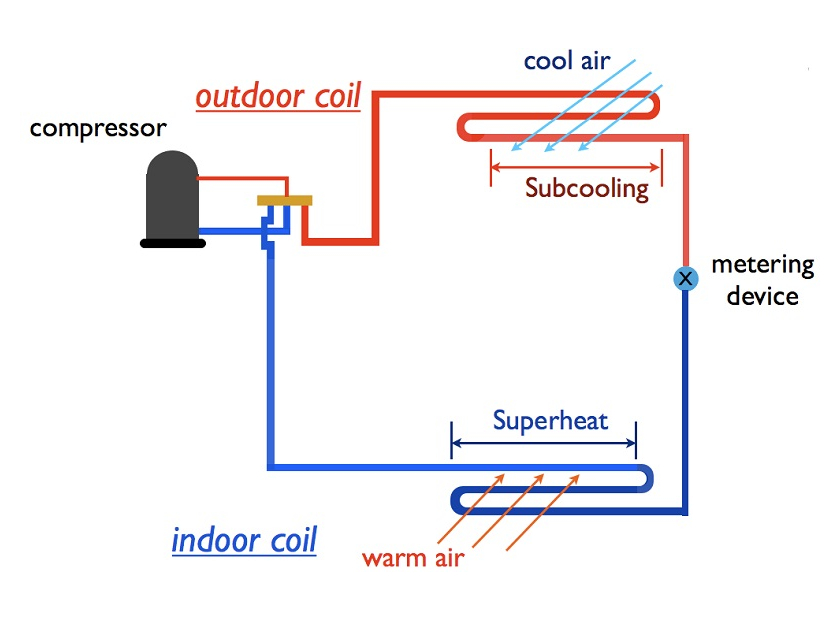
What Are Condenser Coils?
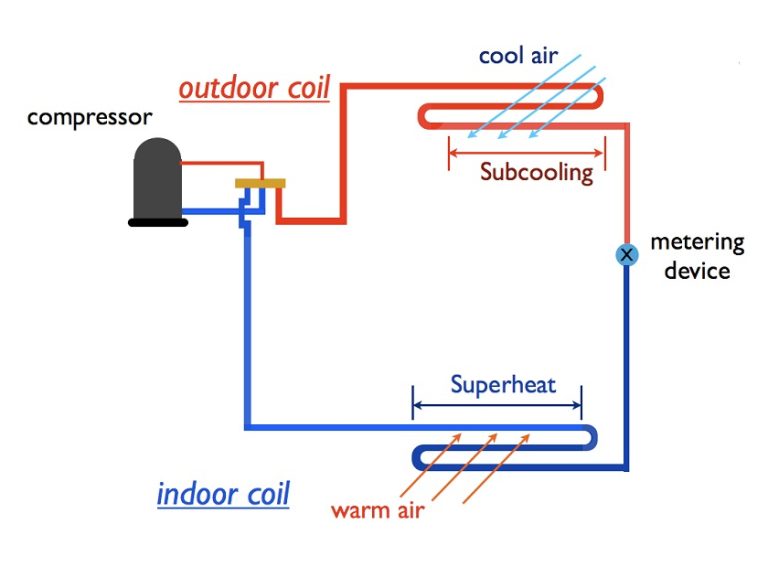
Condenser coils, often referred to as refrigerator coils, play a crucial role in cooling your fridge. They work by extracting heat from the refrigerant gas, turning it into a liquid, and releasing the heat outside the unit. This process keeps your refrigerator running efficiently.
Typically made from copper or aluminum for their excellent heat conduction, these coils are designed in a serpentine or grid pattern to enhance heat exchange.
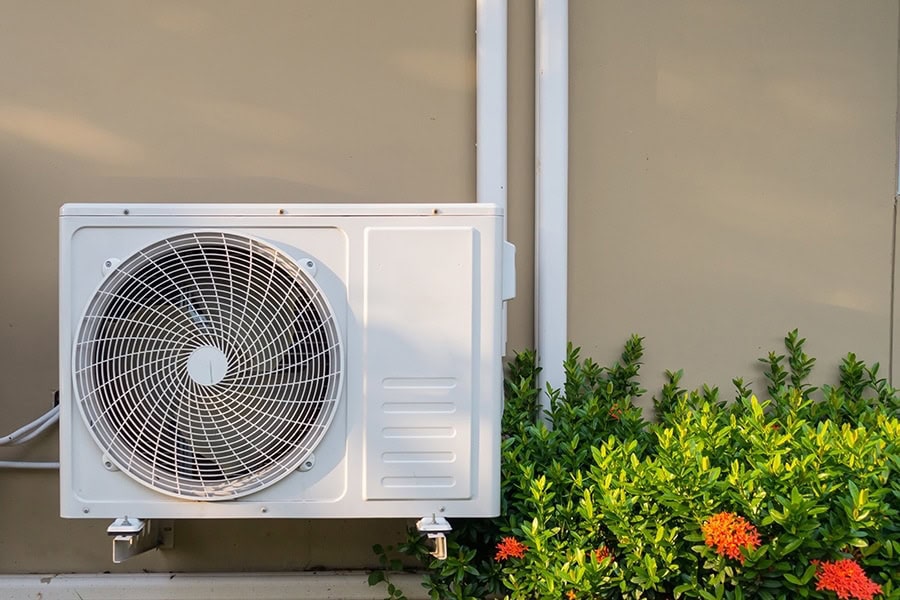
Locating Your Refrigerator Coils
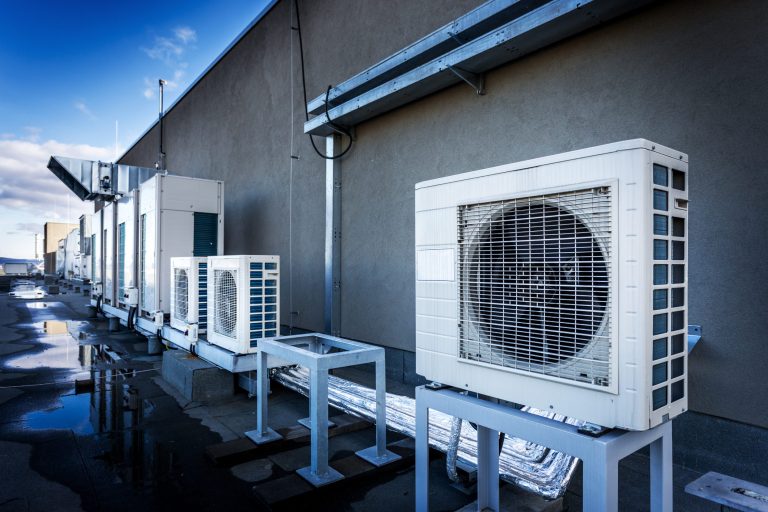
Most refrigerators have a similar setup, with the condenser situated at the bottom, side, rear, or top of the unit.
You can spot the condenser by looking for a grill that releases warm air. To access the coils, you’ll need a screwdriver to remove this grill. Condenser coils feature a finned design, increasing the surface area for heat transfer. The fins are thin metal strips that run vertically, providing extra points for heat dissipation. These tubular coils are connected to the refrigeration system via tubing.
The Importance of Cleaning Coils
Your fridge coils are down there collecting crud, especially the ones near the floor. Every spill, every mop swipe, every bit of dust – it all ends up coating those coils. It’s brutal. Soon enough they’re so caked with grime they might as well be wearing a blanket.
Now your poor fridge is struggling like crazy. Instead of dumping heat like it should, it’s fighting through all that gunk. Bills go up, parts wear out faster, and next thing you know you’re staring at a repair bill that’ll make your eyes water.
Nine times out of ten, when a fridge starts acting up, it’s those filthy coils. They’re choking on dirt while your fridge works itself to death trying to stay cold. But you know what kills me? This whole headache is totally avoidable.
Clean coils are happy coils. They dump heat like they’re supposed to, your fridge runs smooth as butter, and you’re not burning money on power bills or repairs. Simple as that.
Want the real scoop on how to keep those coils clean? Because trust me – five minutes with a vacuum now beats the heck out of replacing a burnt-out compressor later.
Essential Supplies for Cleaning
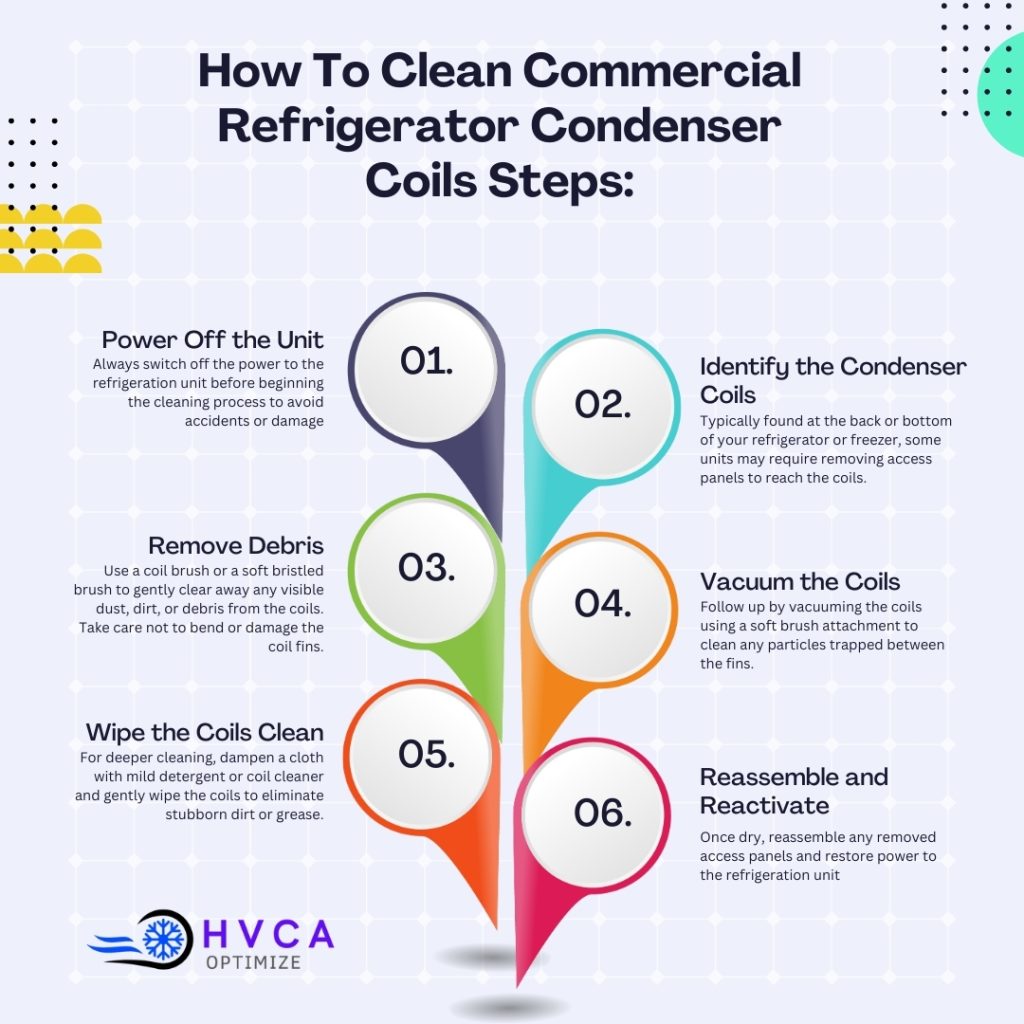
How To Clean Commercial Refrigerator Condenser Coils Steps:
To ensure your refrigeration equipment operates efficiently, it’s important to clean the condenser coils regularly. Depending on the environment and usage, aim to perform this task every three to six months. This essential maintenance can be easily accomplished by following these steps:
Power Off the Unit
Always switch off the power to the refrigeration unit before beginning the cleaning process to avoid accidents or damage
Identify the Condenser Coils
Typically found at the back or bottom of your refrigerator or freezer, some units may require removing access panels to reach the coils.
Remove Debris
Use a coil brush or a soft bristled brush to gently clear away any visible dust, dirt, or debris from the coils. Take care not to bend or damage the coil fins.
Vacuum the Coils
Follow up by vacuuming the coils using a soft brush attachment to clean any particles trapped between the fins.
Wipe the Coils Clean
For deeper cleaning, dampen a cloth with mild detergent or coil cleaner and gently wipe the coils to eliminate stubborn dirt or grease.
Reassemble and Reactivate:
Once dry, reassemble any removed access panels and restore power to the refrigeration unit
When to Clean Refrigerator Condenser Coils
Signs of dirty coils may not always be obvious, appearing gradually. Yet, checking for buildup is as simple as inspecting the front or back grille. Here are indications that cleaning may be necessary:
Rising Energy Costs
Dust accumulation forces the condenser to work harder, leading to increased energy consumption and higher bills.
Continuous Running
A refrigerator struggling to maintain its cooling demands may run continuously, signaling a need for coil cleaning
Unusual Noises
Excessive wear from constant operation can cause the condenser to make louder noises than usual.
Ineffective Cooling
Clogged fins reduce the coil’s ability to dissipate heat, impacting cooling efficiency
Spoiled or Warm Food
If food spoils quickly or isn’t as cold as it should be, dirty coils might be the culprit.
Visible Buildup
Check your user manual to find the coil location, remove the grille, and inspect for visible dirt.

How Often Should You Clean Refrigerator Condenser Coils
For commercial refrigerators, clean the coils every three months or four times a year. Residential units typically require cleaning every six months or twice a year. However, factors like dust levels, pollen, seasonal changes, humidity, and usage can affect how often you should clean. Regular inspections help prevent operational issues and maintain efficiency.
Safety Considerations
Cleaning condenser coils, whether in a commercial or residential setting, is generally safe and can be done by yourself if you adhere to the right cleaning methods and safety measures:
Unplug the refrigerator
Always disconnect the power by unplugging and switching
off the circuit breaker before starting any cleaning or work on internal parts.
Watch out for sharp edges
Be cautious when handling the condenser coils, as the fins
might be sharp, especially while applying cleaning agents or degreasers.
Wear a mask
Dirty condenser coils can release a lot of dust when cleaned. To prevent inhaling these particles, which could aggravate asthma or allergies, wear a face mask
Avoid using water
Refrain from using water on the condenser coils, as it can damage the fins and potentially cause a short circuit when the power is turned back on
Use appropriate cleaners
Opt for cleaners that have been approved by themanufacturer or are specifically designed for this purpose. Using the wrong chemical cleaners could pose safety hazards or damage your appliance.
Adhere to the proper cleaning procedures
Following the steps outlined here or provided by the manufacturer should help you complete the task safely
Taking a little time to follow these straightforward steps can save significant money on repairs, parts, and service call fees for yourself or your business.